开场白
做一个简单的、基于Django框架和MySQL的Web数据库。
ο(=•ω<=)ρ⌒☆
好久没有手搓html了。
数据库通用建立WEB查询指南
写在前面
这是一个非常简单的、通过Django模板框架搭建可在线查询的数据库的建立指南,通过MySQL本地配置。由于是面向作业编程,所以讲解会尽量细致简洁,拓展较少。
需要用到的工具:
环境准备
从官网下载MySQL的8.0版本(其实这个版本应该没什么太大影响):
参看https://blog.csdn.net/JYT20031003/article/details/143926595
下载PyCharm专业版(学生入口):
参考入口https://www.jetbrains.com/community/education/#students
可能还需要配置一个本地的Conda环境,这个就交给互联网了。
正式开始
个人建议同时写前端和后端,但是为了保持清晰的思路,这里选择先从后端开始,然后是前端,两者交替编辑。
后端1
创建数据库
打开MySQL命令行,创建database,用于存放信息。
1
| create database '你的数据库名称' character set utf8;
|
在settings.py文件里加入如下设置:
1
2
3
4
5
6
7
8
9
10
| DATABASES = {
'default': {
'ENGINE': 'django.db.backends.mysql',
'NAME': '你的数据库名称',
'USER': '你的数据库用户',
'PASSWORD': '你的密码',
'HOST': 'localhost',
'PORT': '3306',
}
}
|
ORM
接下来就是有关表的操作,使用的是ORM,这玩意可以简单理解为函数封装。
参考链接:https://blog.csdn.net/weixin_47035302/article/details/131423759
创建表的模型、导入表
在LuvSQL/models.py中定义模型:
1
2
3
4
5
6
7
8
9
10
11
12
13
14
15
16
17
18
19
| class Book(models.Model):
book_id = models.CharField(max_length=8, primary_key=True)
book_name = models.CharField(max_length=50)
book_isbn = models.CharField(max_length=17)
book_author = models.CharField(max_length=10)
book_publisher = models.CharField(max_length=50)
interview_times = models.IntegerField()
book_price = models.FloatField()
class Reader(models.Model):
reader_id = models.CharField(max_length=8, primary_key=True)
reader_name = models.CharField(max_length=50)
reader_sex = models.CharField(max_length=2)
reader_department = models.CharField(max_length=60)
class Record(models.Model):
reader_id = models.ForeignKey(to="Book", on_delete=models.SET_NULL, null=True)
book_id = models.ForeignKey(to="Reader", on_delete=models.SET_NULL, null=True)
borrow_date = models.DateField()
return_date = models.DateField()
notes = models.CharField(max_length=50, null=True)
|
ORM默认设置不允许NULL。
ORM中设置主键、外键如代码所示。
有关主键、外键的设置参看:https://blog.csdn.net/xiaoyu070321/article/details/133687812
添加完表的设置之后,先回settings.py确认是否INSTALLED_APPS中是否已经添加'LuvSQL.apps.LuvsqlConfig'的条目,没有则添加。
接下来我们先来尝试通过镜像将上面设计好的模型映射到实际的数据库表中。
在终端运行这两个命令:
1
2
| python manage.py makemigrations
python manage.py migrate
|
在本地MySQL终端输入下面指令:
1
2
| use LuvSQL;
show tables;
|
你应该能看到book、reader、record出现了:

前端1
主站
简单起见,我们直接写html文件,如果想要装饰网站就写CSS文件。
参看:HTML 基础 - 学习 Web 开发 | MDN
在templates目录下添加一个html文件,命名为site.html,写入内容如下:
1
2
3
4
5
6
7
8
9
10
11
12
13
| <!DOCTYPE html>
<html lang="en">
<head>
<meta charset="UTF-8">
<title>LuvSQL主页</title>
</head>
<body>
<a href="./select"> <h2>查询功能</h2> </a>
<a href="./insert"> <h2>插入功能</h2> </a>
<a href="./delete"> <h2>删除功能</h2> </a>
<a href="./update"> <h2>更新功能</h2> </a>
</body>
</html>
|
无论如何,还是希望读者能理解这些步骤是在做什么。
可以直接打开这个html文件,查看一下,应该会有四个对应的超链接。
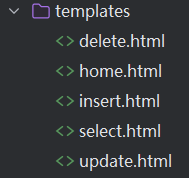
同样的创建各类功能的网页的html文件如下:
然后要让Django知道这个home.html文件是主页,在DjangoProject/urls.py中添加路径如下:
1
2
3
4
5
6
7
| from django.urls import path
from LuvSQL.views import show_home
urlpatterns = [
path('', show_home),
]
|
show_home是什么呢?它是我们即将在LuvSQL/views.py里添加的函数:
1
2
3
4
| from django.shortcuts import render
def show_home(request):
return render(request, 'home.html')
|
render函数用来回馈HTTP请求。
运行一下Django的本地服务器,就会发现在主页里了。
表服务
那么对于其他的站点也是类似的操作,先在urls.py里添加路径:
1
2
3
4
5
6
7
8
9
10
11
12
| from LuvSQL.views import show_select, show_insert, show_delete, show_update
urlpatterns = [
path('select/', show_select),
path('insert/', show_insert),
path('delete/', show_delete),
path('update/', show_update),
]
|
然后修改views.py文件:
1
2
3
4
5
6
7
8
9
10
11
| def show_select(request):
return render(request, 'select.html')
def show_insert(request):
return render(request, 'insert.html')
def show_delete(request):
return render(request, 'delete.html')
def show_update(request):
return render(request, 'update.html')
|
可以尝试一下,这时从主站到各个功能页面的跳转功能也能使用了。
查询操作
前端2
先填写select.html的内容:
1
2
3
4
5
6
7
8
9
10
11
12
13
14
15
16
17
18
19
20
21
22
23
| <!DOCTYPE html>
<html lang="en">
<head>
<meta charset="UTF-8">
<title>LuvSQL查询</title>
</head>
<body>
<h2>请输入您的查询内容</h2>
<form method="post" action="/select_result/">
{% csrf_token %}
<h4> From 项(只支持单表查询) </h4>
<label for="From">查询的表格:</label>
<input type="text" id="From" name="From"><br><br>
<h4> Where 项(至多一项) </h4>
<label for="Where">查询的条件:</label>
<input type="text" id="Where" name="Where"><br><br>
<h4> Select 项(允许*号) </h4>
<label for="Select">查询的属性:</label>
<input type="text" id="Select" name="Select"><br><br>
<input type="submit" value="查询">
</form>
</body>
</html>
|
留意这个action="/select_result/"这是发送请求的目的urls。
运行一下,就能看到这个比较简陋的页面:
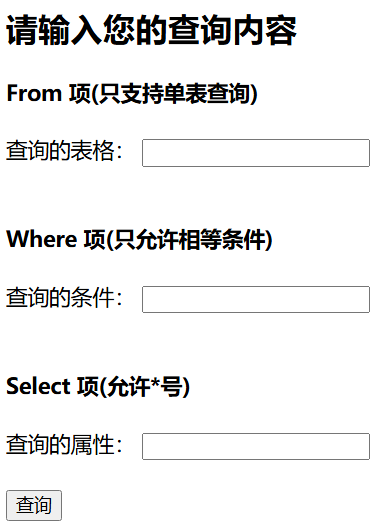
这里的查询逻辑写得很有限,但是无妨,功能都是可以扩展的。
尝试一下查询,可以看到运行栏有这样的提示:

这就说明前端已经发送消息返回了。
为了查看消息,接着我们在views.py文件里添加select的实现函数:
1
2
3
4
5
6
7
8
9
10
| def select(request):
_from = request.POST.get('From', 'no_found')
_where = request.POST.get('Where', 'no_found')
_select = request.POST.get('Select', 'no_found')
context = {
'From': _from,
'Where': _where,
'Select': _select,
}
return render(request, 'select.html', context)
|
暂时先不进行表的查询,这里只是返回原本的查询语句。
当然前端要通过urls调用这个函数,就要通过之前的action="/select_result/",我们还是将其加入DjangoProject/urls.py的对应位置:
1
2
3
4
5
| from LuvSQL.views import select
urlpatterns = [
path('select_result/', select),
]
|
接着给select.html里加入显示返回结果的标签:
1
2
3
4
| <p>查询语句:
Select ( {{ Select }} )
From ( {{ From }} )
Where ( {{ Where }} ) </p>
|
尝试发送查询请求,就能看见网页结果了。
其实这里的实现是有些别扭的,函数查询的主体不应该写在views.py中,不过小程序的话无妨。
后端2
SQL的查询语句已经能在后端接收到了,接着我们要处理它,返回结果。
在models.py中,
先在各个models.Model的继承类中加入col_list列表,存放列名。
写出查询函数,这里给我个人的实现方案:
1
2
3
4
5
6
7
8
9
10
11
12
13
14
15
16
17
18
19
20
21
22
23
24
25
26
27
28
29
30
31
| def mod_select(_from, _where, _select):
table = globals().get(_from)
if table is None:
return None
where_list = {}
if _where == '':
pass
else:
where_list_s = _where.split(',')
for case in where_list_s:
temp = case.split('=')
for i in range(len(temp)):
temp[i] = temp[i].strip()
where_list[temp[0]] = temp[1]
select_list = []
if _select == '*':
select_list = table.col_list
else:
select_list_s = _select.split(',')
for i in range(len(select_list_s)):
select_list_s[i] = select_list_s[i].strip()
select_list.append(select_list_s[i])
data_list = table.objects.filter(**where_list).values(*select_list)
return data_list
|
这是后端处理查询请求的核心,可以看到这里只支持单表查询,目前阶段能这样就够了。
在views.py开始导入刚才定义在models.py中的函数:
1
| from LuvSQL.models import mod_select
|
在select中调用这个函数:
1
2
3
4
| def select(request):
result = mod_select(_from, _where, _select)
print(result)
|
这里使用了print函数,我们先给本地的MySQL的Book表中随便添加一项数据,方便测试。
在网页中尝试查询刚才添加的项:

本地应该能输出如下结果:

把它放入content中:
1
2
3
4
5
6
7
8
9
|
ret_s = ""
for i in range(len(result)):
ret_s += str(result[i])
ret_s += '\n'
context = {
'Result': ret_s,
}
|
别忘了在html文件里加入显示结果的标签:
1
2
| <h4> 查询结果: </h4>
<div style="white-space:pre">{{ Result }}</div>
|
使用<div style="white-space:pre">是为了能让它换行
这边显示结果比较潦草,感兴趣完全可以将结果装饰得好很多。
对它使用查询吧!

解决一些简单的BUG
由于上面的mod_select函数在table输入不合法时会返回None,所以会产生问题,加一个特判即可:
1
2
3
|
if result is None:
return render(request, 'select.html')
|
当查询的Select项为空时,默认视为"*"即可,也方便了网页的查询填写:
1
2
3
4
5
6
|
select_list = []
if _select == '*' or _select == "":
select_list = table.col_list
else:
|
如此一来,可以在只输入表名而不输入其他查询信息时返回整个表:

那么一个简单实用的查询功能就做完了。
当然,实际上的SQL语句解析应该是靠语法树解析得到的,这里的实现很直接也很简单,像遇到不存在的列名等问题会缺乏查错机制,不过都是可以完善的。
增添操作
前端2
增、删、改这些操作是类似的,这里还是用同一个流程处理。
先填写insert.html文件:
1
2
3
4
5
6
7
8
9
10
11
12
13
14
15
16
17
18
19
20
21
22
23
24
25
| <!DOCTYPE html>
<html lang="en">
<head>
<meta charset="UTF-8">
<title>LuvSQL插入</title>
</head>
<body>
<h2>请输入您的插入内容</h2>
<form method="post" action="/insert_result/">
{% csrf_token %}
<h4> Into 项 </h4>
<label for="Into">插入的表格:</label>
<input type="text" id="Into" name="Into"><br><br>
<h4> Values 项 </h4>
<label for="Values">插入值:(要求必须完整格式)</label>
<input type="text" id="Values" name="Values"><br><br>
<input type="submit" value="插入">
<p> 插入语句:
Insert into ( {{ Into }} )
Values ( {{ Values }} )</p>
<h4> 插入结果: </h4>
<div style="white-space:pre">{{ Result }}</div>
</form>
</body>
</html>
|
借鉴select功能,对应填写urls.py文件,以及insert函数:
1
2
3
4
5
6
7
8
9
10
11
12
13
| def insert(request):
_into = request.POST.get('Into', 'no_found')
_values = request.POST.get('Values', 'no_found')
result = mod_insert(_into, _values)
context = {
'Into': _into,
'Values': _values,
'Result': result,
}
return render(request, 'insert.html', context)
|
后端2
设计insert函数如下:
1
2
3
4
5
6
7
8
9
10
11
12
13
14
15
16
17
18
19
| def mod_insert(_into, _values):
table = globals().get(_into)
if table is None:
return None
values_list = {}
values_list_s = _values.split(',')
for case in values_list_s:
temp = case.split('=')
for i in range(len(temp)):
temp[i] = temp[i].strip()
values_list[temp[0]] = temp[1]
obj = table.objects.create(**values_list)
obj.save()
return "SUCCESS"
|
尝试一下,插入成功返回SUCCESS:

再查询一下,可以看到多了对应项:

增添操作完成了。
删除操作
在清楚前两个操作的逻辑之后,其实希望之后的操作都能由读者自己完成。
前端2
先填写delete.html文件:
1
2
3
4
5
6
7
8
9
10
11
12
13
14
15
16
17
18
19
20
21
22
23
24
25
| <!DOCTYPE html>
<html lang="en">
<head>
<meta charset="UTF-8">
<title>LuvSQL删除</title>
</head>
<body>
<h2>请输入您的删除内容</h2>
<form method="post" action="/delete_result/">
{% csrf_token %}
<h4> From 项 </h4>
<label for="From">删除的表格:</label>
<input type="text" id="From" name="From"><br><br>
<h4> Where 项(只允许相等条件) </h4>
<label for="Where">删除的条件:</label>
<input type="text" id="Where" name="Where"><br><br>
<input type="submit" value="删除">
<p>删除语句:
Delete from ( {{ From }} )
Where ( {{ Where }} ) </p>
<h4> 删除结果: </h4>
<div style="white-space:pre">{{ Result }}</div>
</form>
</body>
</html>
|
然后设计前端delete函数并补充相应设置:
1
2
3
4
5
6
7
8
9
10
11
12
13
| def delete(request):
_from = request.POST.get('From', 'no_found')
_where = request.POST.get('Where', 'no_found')
result = mod_delete(_from, _where)
context = {
'From': _from,
'Where': _where,
'Result': result,
}
return render(request, 'delete.html', context)
|
后端2
类似前面设计mod_delete函数:
1
2
3
4
5
6
7
8
9
10
11
12
13
14
15
16
17
18
19
20
21
| def mod_delete(_from, _where):
table = globals().get(_from)
if table is None:
return None
where_list = {}
if _where == '':
pass
else:
where_list_s = _where.split(',')
for case in where_list_s:
temp = case.split('=')
for i in range(len(temp)):
temp[i] = temp[i].strip()
where_list[temp[0]] = temp[1]
obj = table.objects.filter(**where_list).delete()
return "SUCCESS"
|
这里的实现中,如果没有输入条件,就是认为删除所有数据项
这里给Reader表先插入一个数据:

然后可以尝试一下删除操作:

查询Reader表,应该是一个空表:

删除操作完成了。
更新操作
前端2
更新的话,我希望能有一个更新前后的对比,所以先执行一次查询操作,再执行更新操作,都返回表项,并列展示。
先填写update.html文件:
1
2
3
4
5
6
7
8
9
10
11
12
13
14
15
16
17
18
19
20
21
22
23
24
25
26
27
28
29
30
31
| <!DOCTYPE html>
<html lang="en">
<head>
<meta charset="UTF-8">
<title>LuvSQL更新</title>
</head>
<body>
<h2>请输入您的更新内容</h2>
<form method="post" action="/update_result/">
{% csrf_token %}
<h4> Update 项 </h4>
<label for="Update">更新的表格:</label>
<input type="text" id="Update" name="Update"><br><br>
<h4> Where 项(只允许相等条件) </h4>
<label for="Where">更新的条件:</label>
<input type="text" id="Where" name="Where"><br><br>
<h4> Set 项 </h4>
<label for="Set">更新的属性:</label>
<input type="text" id="Set" name="Set"><br><br>
<input type="submit" value="更新">
<p> 更新语句:
Update ( {{ Update }} )
Set ( {{ Set }} )
Where ( {{ Where }} ) </p>
<h4> 更新结果(更新前): </h4>
<div style="white-space:pre">{{ Result1 }}</div>
<h4> 更新结果(更新后): </h4>
<div style="white-space:pre">{{ Result2 }}</div>
</form>
</body>
</html>
|
这时候views.py和models.py分离的好处就体现出来了,可以简洁地先调用一次mod_select再调用一次mod_update:
1
2
3
4
5
6
7
8
9
10
11
12
13
14
15
16
17
18
19
20
21
22
23
| def update(request):
_update = request.POST.get('Update', 'no_found')
_set = request.POST.get('Set', 'no_found')
_where = request.POST.get('Where', 'no_found')
result1 = mod_select(_update, _where, '*')
if result1 is None:
return render(request, 'update.html')
result2 = mod_update(_update, _set, _where)
context = {
'Update': _update,
'Set': _set,
'Where': _where,
'Result1': ret_s_1,
'Result2': ret_s_2,
}
return render(request, 'update.html', context)
|
后端2
在models.py设计mod_update函数如下:
1
2
3
4
5
6
7
8
9
10
11
12
13
14
15
16
17
18
19
20
21
22
| def mod_update(_update, _set, _where):
table = globals().get(_update)
if table is None:
return None
where_list = {}
if _where == '':
pass
else:
set_list = {}
if _set == '':
pass
else:
data_list = table.objects.filter(**where_list)
data_list.update(**set_list)
return data_list.values()
|
重新向Reader表插入项:

尝试修改该项,让项羽回归西楚霸王:

更新操作完成了。
功能完善
子页面向主页的返回
在测试的过程中发现,每次从子页面回主页面要手动修改url,有点废手,在各个子页面里添加回主页的标签:
1
| <a href="../"> <h2>回到主页</h2> </a>
|
这样就能方便返回主页了:

完结撒花
恭喜,到此为止你完成了一个简单的Web数据库。
其实本来还想加上CSS使得网页更好看的,结果由于跨域请求等问题就放弃了。没事的,这一次写这个Web还是让我自身也回顾了很多东西。
ο(=•ω<=)ρ⌒☆